Nature Photography Presentation Tonight

Join me tonight (May 2, 2023) at the Georgia Nature Photographers Association – Griffin Chapter for a nature photo presentation on South Texas’ private and public hot spots. This presentation is for anyone wanting to capitalize on the diverse flora and fauna of South Texas but is unsure where to go. There are private ranches available that cater to nature photography but there are also a lot of public properties where spectacular nature images can be taken.

The Thrill Of The Hunt

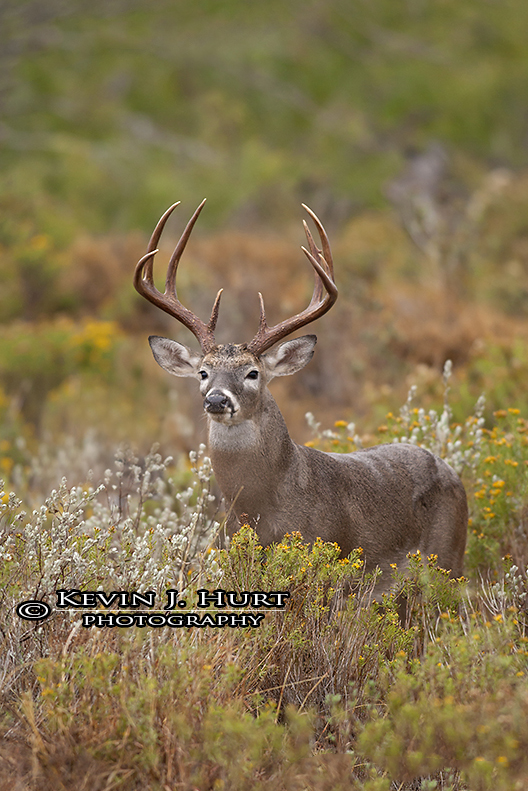
121124_port mansfield__n0j3950_0066

Deer season is nearing an end and many hunters have filled their tags while others are still waiting on that one special animal. It’s been over 16 years since I hunted (I guess I’m still hunting but these days I’m armed with a 500mm lens) but I still get excited at the site of a truly beautiful buck. The hunting industry seems to have gone a bit awry, obsessed with manufacturing genetically freakish antlers to fuel hunter appetites for that record book buck. To me, genetically modified nontypical freaks have become somewhat grotesque. I much prefer the beauty of a big typical (natural) deer.

On this day, I woke up at 5AM, packed my gear in the truck, then drove to the ranch for my day’s hunt (yes, I was using a camera but I was hunting just the same). I had no idea what I would see on this day and that’s part of what I found exciting. At mid-morning, this buck appeared from the thick brush with his nose to the ground. It’s not often that one captures a mature buck like this in the open and in broad daylight, but when one does, it likely has something to do with the rut and a buck’s interest in finding a lady suitor. That was certainly the case here as he was hot on the trail of a doe in estrus. I tracked him through the lens, gave a slight vocal grunt to get his attention and have him stop. When he looked up and locked his ears on the sound I made, I took my shot and bagged my trophy for the year. That, my friends, was a thrilling hunt.

Photographically, what made this shot possible at that late morning hour was the overcast day. A bright sunny day would have ruined this moment with too much contrast/shadow. With the overcast sky, I had softened light that allowed me to photograph longer this morning. Overcast skies can be dull from a color perspective but setting the white balance to cloudy enhances the colors.

Until next time, good light and keep shooting.–KEVIN

Follow me on instagram: hurtnaturephoto

I Broke Down And Created an Instagram Account: HurtNaturePhoto

I have resisted opening an instagram account for the longest time as keeping up with a blog, website, and facebook is more than enough social media for me. However, I recognize that it is a popular platform and so I finally broke down and created my own Instagram Account. I hope you will visit and like the images. Chances are you have seen the ones I posted there on here in the past but it’s also highly likely that many of the images there will be new to you. I’ll be populating it with more images in the coming days and moving forward, I’ll share some images here but not there and vice-versa. Thanks in advance for any views/likes you may give.

Until next time, good light and keep shooting — KEVIN

Image Spotlight: Vermillion Flycatcher (2)

I recently returned from a trip to South Texas and while there I visited one of my old hotspots–Llano Grande State Park (i.e., Big Plains State Park). I have a love-dislike relationship with this park. On the positive side, it’s a great place to see and photograph many different bird species. In addition, if one is lucky, alligators or bobcats may be seen. I’ve had luck in the past with the alligators but the bobcat continue to elude me. What I dislike about the park is the large number of joggers, bikers, and portrait photographers that always seem to make their presence when the action is good, which inevitably scares the birds away. On more than one occasion, I’ve been photographing birds in beautiful light only to be interrupted by a portrait photographer attempting to take homecoming or quinceanera (15th birthday) photos. In case you are starting to wonder about that rant, yes it is a state park and they have just as much right to enjoy it as a bird watcher or photographer; BUT, a little common courtesy seems to be in order here. It’s a 230 acre wetland park so if someone is already photographing birds where you desire to take portraits…respect the photographer already there and find another place for the portraits…just don’t setup in the same location and start shooting.

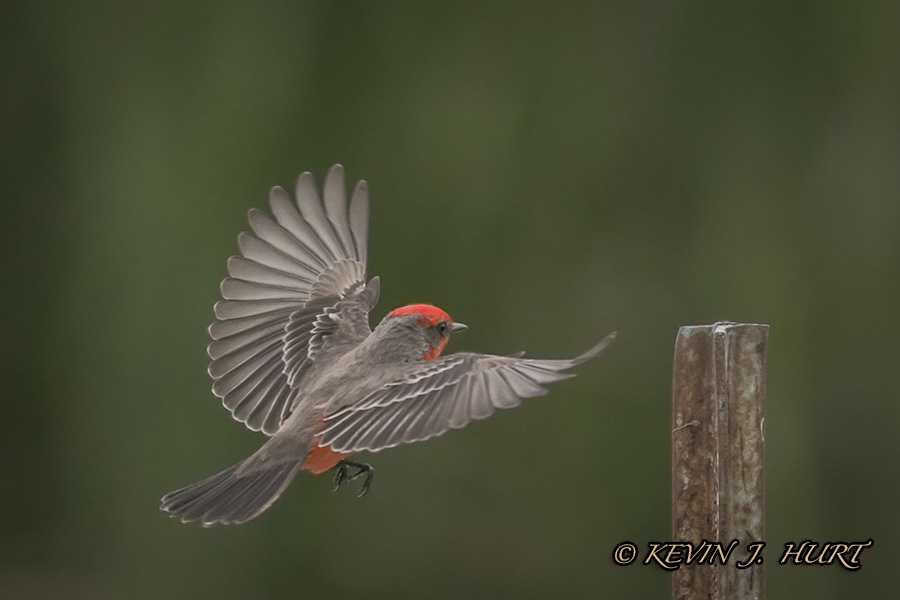
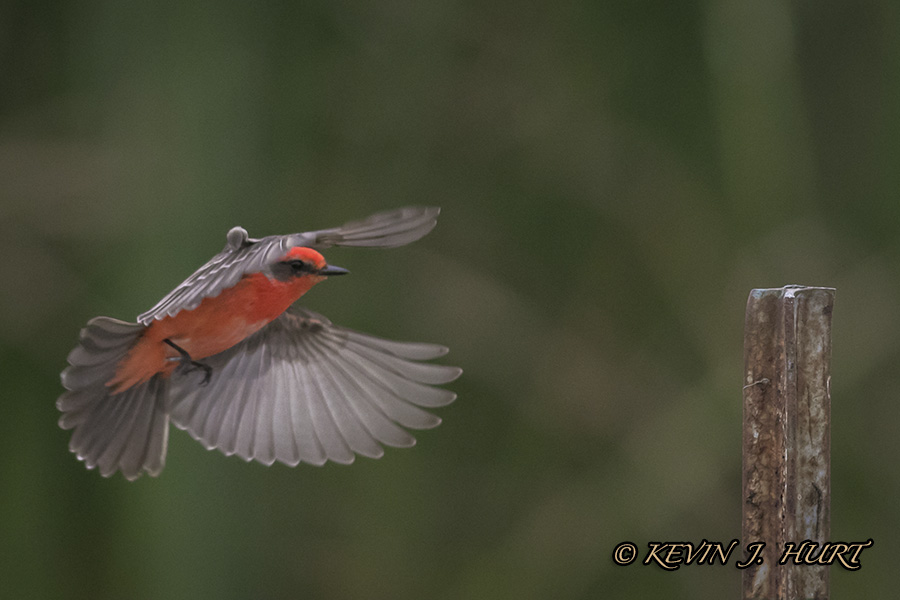
OK, that’s off my chest. Lets get to the images in this post. The Vermillion Flycatcher’s winter range includes the Rio Grande Valley (South Texas). For the past 3 years I have seen this bird flying from perch to perch near the big pond behind Llano Grande’s park headquarters. Unfortunately, the perches within photographic distance near this area are man made; but hey, sometimes it’s good to photograph wildlife that shows the hand of man. I’d prefer a natural perch, but when photographing at a state park, one rarely has control of his or her shooting conditions.

Vermillion Flycatcher

Vermillion Flycatcher | Canon 7D MkII | ef 500/4.5 | ISO 6400  |  White Balance: Cloudy

On this particular day, the light was terrible, i.e. it was dull, overcast, and gray. In order to achieve a high enough shutter speed to freeze the wings in these light conditions, I would need to bump the ISO on my camera to 6400 and even then, the shutter speeds were not as high as I would desire. I had observed this vermillion flycatcher frequently visiting this perch as it fed on insects. So, as it made it’s rounds to a different perch I setup my shooting position on this post and then waited. It was a short wait. From this post, the vermillion flycatcher would take off, attempt to catch an insect (often successfully), then fly back and repeat the sequence. Understanding this behavioral pattern, I prefocused on the perch and upon the vermillion’s return, I depressed the shutter and let the 7D MkII capture its 8 frames per second. I liked the two shared here.

181229_texas__20a4237_0104-20181229

Vermillion Flycatcher | Canon 7D MkII | ef 500/4.5 | ISO 6400  |  White Balance: Cloudy

I hope to capture this bird in better light next year but for now, I’ll have to be content with these two. Until next time, good light and keep shooting. –KEVIN

For information on the equipment used to capture these images, please click on the gear recommendations tab.

Mirrorless Cameras for Indoor Sports

I have had several questions from people who are considering mirrorless options for sports photography so I put together this post to discuss some of the pros and cons of this decision over the DSLR setups. First, let me disclose that while I do own a mirrorless camera, I use a Canon DSLR and a variety of lenses for my primary photography, including sports. Saying that, I can offer a number of observations as an experienced photographer for those wanting opinions about mirrorless options for sports photography.

In general terms, one of the obvious advantages of the mirrorless cameras is their smaller size and weight. That’s not a small concern as lugging around the heavier equipment all day gets tiring, especially as one gets older. Their image quality and performance have significantly improved to the point that converting to mirrorless is a viable consideration, particularly if you are a landscape or portrait photographer. The autofocus capabilities are very responsive but the professionals that I know are not convinced that, on average, they are as good as the DSLR’s in their camera bag. Note, the very top models (e.g. SONY A9) may have caught up but their prices are as high or higher than the DSLR’s. So, whether the average mirrorless options are as good for sports is a question I cannot definitively answer, particularly indoor sports. I can say that my mirrorless camera’s autofocus system (in terms of tracking a moving subject) is not as good as my DSLR but I also have an older mirrorless camera so today’s cameras are bound to be better.

At present, one of the most obvious disadvantages is cost. Canon recently came out with a great mirrorless option but when I looked at the price of that and it’s accompanying lenses, I was done. It wouldn’t make sense for me financially. I know I can use an adapter to use my ef lenses on the mirrorless camera but if reducing size and weight is the objective, what’s the point?

With those general observations, lets focus on some of the better mirrorless options out there and discuss some of their strengths/weaknesses as they relate to indoor sports photography. I will particularly make my observations as it relates to photographing indoor volleyball games, though the same would be applicable to basketball, hockey, or any other indoor event. Unlike professional indoor venues that are very well lit for television purposes, most will be photographing in gyms with very poor light and this will dictate the need to use fast lenses (f/2.8 or faster) and higher ISO settings (e.g. 3200-6400).

Click on Links to Purchase or See Pricing Options

SONY A7 III

  • Full-frame, 24mp sensor
  • ISO 100-51,200 range
  • 4K video
  • Good High ISO performance
  • 693 AF (autofocus) points, makes it very responsive so it can track a subject. Users report it locks on a subject but often for a split second so real-world tracking may be useable, but perhaps a bit less reliable.
  • Dual card slots (only one is fast so buffering can be an issue if shooting to both simultaneously)
  • 10 fps continuous shooting at 24mp for up to 89 images in RAW format. Actual usage closer to 8 per owners of this camera.
  • Good battery performance – rated at 710 images on one battery charge (note these are clinical lab tests, user experiences report significantly higher numbers)
  • $1200 less than the A7R3
  • Good selection of native glass
  • 5-axis in camera body stabilization

SONY A7R3

  • Essentially identical to Sony A7III with the following differences
    • Better EVF (electronic viewfinder) over the A7III
    • 42mp full frame sensor
    • More weather sealing than A7III (not an issue indoors but stating an advantage)
    • Fewer autofocus points (399)—users report it is not a noticeable difference in real-time shooting
    • Shutter – rated at a slightly longer lifespan
    • Battery life rated at 610 images on one battery charge
    • ISO 100-32000 range

Canon EOS R

  • Good all around camera (rumored concerns about performance with longer telephoto lenses, i.e. beyond 300mm)
  • 30 mp sensor
  • ISO 100-40,000 range (good high ISO performance)
  • Up to 8 fps for 47 frames in RAW
  • Accurate AF system
  • Lacks a joystick to conveniently select AF point
  • Single Card Slot
  • With Adapter, can use any EF or EF-S lenses (focusing slowed slightly with adapter)
  • Fewer native R-mount options

Olympus OMD-E1 Mk II

  • 20mp micro 4/3 sensor (2x crop factor)
  • Dual card slot (one is faster than other so buffering may be a concern if writing to both cards simultaneously)
  • 200-6400 ISO Range (Good High ISO performance)
  • 4K video
  • 5 axis in-camera body stabilization
  • Up to 15 fps at 20 mp. BUT, no continuous AF so anticipating the action becomes paramount
  • Low Speed Sequential yields about 10fps WITH continuous AF capability
  • Single point AF system is most accurate over entire focusing area
  • Battery rated at 400 images. Again, actual usage is significantly improved.
  • Full rotating screen

Overall, each of these cameras is a viable option for indoor sports. If I had to choose one and I did not own any other camera system, I would go with the SONY A7III. SONY sensor quality is outstanding and the full frame sensor and native lens choices make it very attractive. As important as the camera bodies are, what matters most is the glass you use. Specifically for indoor volleyball games, the following focal lengths are ideal: 24-70mm and 70-200mm. As mentioned, these need to be fast (at least f/2.8) to get shutter speeds high enough to freeze action in poorly lit gymnasiums. If one photographs from the side (e.g. positioned at the net), the 24-70 lens will be ideal from midcourt to camera. Players on the far court can be photographed but you will likely crop to the desired composition (not a problem with 24mp). From the same position, the 70-200 mm on a full frame sensor will be ideal for everyone on the court except the hitter closest to the photographer. From the end of the court, or from further in the stands in a school gym, the 70-200 is ideal for any of the players on the court. I prefer to be at court level so I tend to position myself near the net. I have photographed entirely with a 50mm lens on a  crop camera (essentially an 80mm lens) and taken some spectacular images. I’ve also photographed an entire game with just the 70-200mm lens with the same results. I highly recommend you get the best glass you can. Below are some options that I recommend:

SONY FE 24-70mm f/2.8

SONY FE 70-200mm f/2.8

The two lenses above should cover most any indoor photographic need. There are other options that one could chose that may be more affordable. For example, one could select a faster prime in a desired focal length (e.g. 50mm on crop factor camera or 85mm on a full frame). Alternatively, one might select a 3rd party lens in the desired focal length. Below are a few alternatives worth considering.

Tamron 28-75mm f/2.8

Sony 50mm f/1.8

Sony 85mm f/1.8

There are some excellent f/4 lenses in the Sony lineup that are solid performers; but again, given the poor lighting conditions of most indoor gyms, I do not think these are real options. Using an f/4 lens is going to force one to use high ISO settings in the 6400+ range and this introduces a significant amount of noise to the image. It’s useable and can be cleaned up in post processing but starting off with a cleaner file is best. If one is shooting outdoor sports, then these f/4 options become significant considerations and their f/4 aperture offers a cost savings relative to the more expensive f/2.8 lenses.

Mirrorless cameras–is it their time? For me, not yet. I’m not sure if they ever will be given my significant investment in current Canon glass. I’ve always been intrigued with the Olympus micro 4/3 camera setups and their pro lenses (12-24, 40-150, and 300mm), but at their prices, I am better off simply investing in better glass for my current DSLR. The full frame sensor on the Sony mirrorless cameras has also always been enticing but for me, none of these options make sense. If you are starting out, or if physical conditions dictate that you need a smaller/lighter system, then mirrorless cameras may just be the best option as camera manufacturers seem pretty dedicated in continuing to expand the performance of these camera systems. Their performance today is impressive so look for continued improvements in the years ahead.

I hope this post has been useful. If you want to consider traditional DSLR systems, check out my gear recommendation page for my input on the various Canon cameras and lenses that I use.

Until next time, good light and keep shooting– KEVIN


ImageSpotlight: Red Eared Slider Reflection

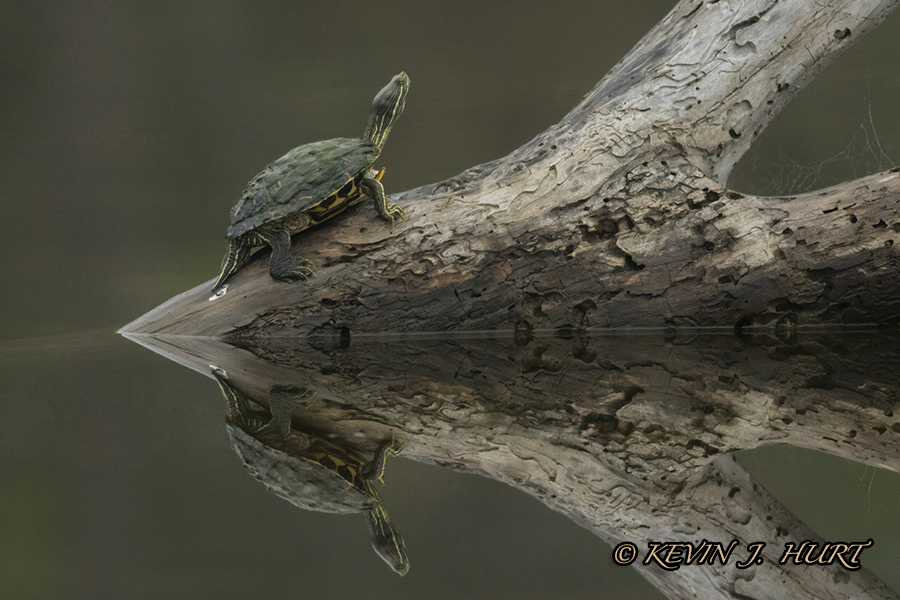
171226_LlanoGrandeStatePark__20A3481_0055-20171226

During a recent trip to South Texas I found this red eared slider sitting on an old log. It was an extremely quiet morning around Ibis Pond at Estero Llano Grande State Park. The birds were not too active on this day but this image was one I could not pass up.  While this turtle is native to much of the Southern United States and Mexico, its popularity in the pet trade has made this an invasive species elsewhere due to their release by pet owners. While I have many concerns with the pet trade (exotic pet trade in particular), I will leave that to another post. In this part of the world, and in this image, the red eared slider is in its native habitat and thriving in a balanced ecosystem.

I used the gear below to capture this photograph (to see a description of this and other gear I recommend, please see my gear recommendations page).

Canon 7D Mk II 

Canon 500mm

Gitzo Tripod

Kirk BH1 Ballhead

Until Next Time….Good Light and Keep Shooting! –KJHurt


ImageSpotlight: Great Blue Heron with Prey

Great Blue Heron.  Canon 7D | 500/4.5

Great Blue Heron. South Padre Island, Texas.

During a quick visit to Texas, I ventured out one morning to South Padre Island. I’ve always had good luck at this location and the morning would not let me down. While a bit slow by a “good day” standard, my patience was rewarded as this Great Blue Heron began to hunt/fish in front of me. I managed a series of images of this particular sequence and this is one I particularly liked with the heron’s wing position and the blood trailing from fish to water.

Until next time, good light and keep shooting. — KEVIN

Gear I used to make this shot:

Canon 7D – I used v1 of this camera body which is now my backup to the 7DMII.

Canon 500mm–  I used version 1 of this lens which is no longer available now that vII is.

Gitzo Tripod – I own and still use the Gitzo 1325 which has not been manufactured for years now. However, I have linked a good on you can purchase today (other options on my gear recommendations page).

Wimberley WH200– an essential piece of gear for long lenses.

Wimberley P40– without this you can’t mount the lens to the tripod.


What About Camera Kits?

Recently, I added a page on my blog for “Gear Recommendations” and there is a wealth of information there about Canon camera bodies, lenses, accessories, and miscellaneous items people may need and perhaps have not considered (Nikon offers similar equivalent options). However, I knew I would get a question about my recommendations on “kits” so I’m going to give my thoughts on that here.

  1. You probably shouldn’t get a bundled kit.
  2. Some bundles may actually be pretty good.

Wait! Didn’t I just contradict myself with points 1 and 2? I mean, should you buy a kit or not? I’m not really helping here am I? Let me clarify the confusion I may have created.

Typical things bundled in a kit include tripods, filters, camera bags, memory cards, lenses, and miscellaneous things most of which you will probably lose in time. If you read my gear recommendations page, I actually own all of those things (including misc. items I’ve accumulated over the years that in retrospect I didn’t need but I’m a recovering gear junkie so cut me a little slack 🙂 …please). So here is what I recommend after more than 15 years of shooting.

To make sure that you are getting a good kit, focus primarily on the camera body and bundled lenses. Make sure these are name brand (e.g. Canon, Nikon), particularly as it pertains to lenses. However, if a bundled lens is from Tamron, Sigma, or Tokina, it’s probably a decent lens. If it’s another brand, don’t get too excited. All of the lower-priced kits will contain entry level consumer cameras but manufacturers have improved their offerings that even with an entry-level body you can capture stellar images and video. What you lose in these camera bodies that you would gain moving up to a prosumer body is often ISO performance, frames per second, and ergonomics that make it easier to control shooting options (e.g. exposure compensation).

The problem with most bundled items is that the quality is just not there for serious photography. For example, the tripods are decent (perfectly fine for a mirrorless system) but they typically do not support a lot of weight so they won’t be steady and I certainly wouldn’t trust their mounting system to secure the camera body & lens to the tripod head (no thanks I say to the plastic mounting systems). The filters are not multicoated and likely will cause a major color cast so if you put cheap glass on a quality lens, you just turned that quality lens into a cheap one (not something you would knowingly want to do). Some lenses are decent to start and learn with, or perfectly acceptable for outdoor shooting with plenty of light, while others are gimmickry. If you are wanting a bundle for indoor photography, these may work provided you can use external flash (not the one on your camera); but, if you are relying on ambient light, these kit lenses will leave you wondering why your images are blurry, especially if you are trying to shoot sports.

As for the other accessories, make sure they are a known brand (e.g. Sandisk, Lexar, Hoya, B&W, Tamron, Sigma, Tokina). In the case of memory cards, you are not likely to get Sandisk Extreme, or Lexar Professional but cards from these manufacturers are still very reliable and they won’t be bad to start with (you can always used them as a backup should you ever fill the other memory cards that you will no doubt end up purchasing). For almost all other bundled items, you can find an alternative use for them or probably throw them in a drawer and forget about them, they’re really not worth much (but bundles vary so you might find a lucky gem).

While I’m still a firm believer that you should probably independently purchase the items you need to suit your needs, if you want to start with a kit, here are some decent options (as of the time of this writing):

Canon EOS Rebel T6 Bundle

Canon EOS Rebel T7i Bundle

Canon 80D Bundle – Note that this is a prosumer camera body.

Nikon D3400 Bundle

Nikon D5600 Bundle

Nikon D7200 Bundle This too is a prosumer camera body.

Sony A7 Bundle

Olympus OMD EM10-MkII Bundle

Olympus OMD Em-5MkII Bundle

NOTE: The Sony and Olympus bundles are mirrorless cameras. The SONY is a full frame mirrorless camera with a phenomenal sensor. These are very popular with landscape photographers because of their small size, weight, and that SONY sensor. I don’t own this or the Olympus cameras listed here but I do own an older Olympus mirrorless camera (E-Pl2) that is a surprisingly good little shooter, particularly for an older camera. I’ve always wanted to upgrade and play with the Olympus mirrorless camera and lens options (not to replace my Canon gear, just to add the OMD to the lineup of fun) but as I said earlier, I’m a recovering gear junkie so I have to guard against falling off the wagon…or is that falling on the wagon? You get the idea :).

I hope this helps answer questions about what camera bundles to consider. If you want to know about specific options, contact me with your photography objectives and I’d be happy to recommend some gear based on your photographic goals/budget.

Until then, good light and keep shooting. –Kevin
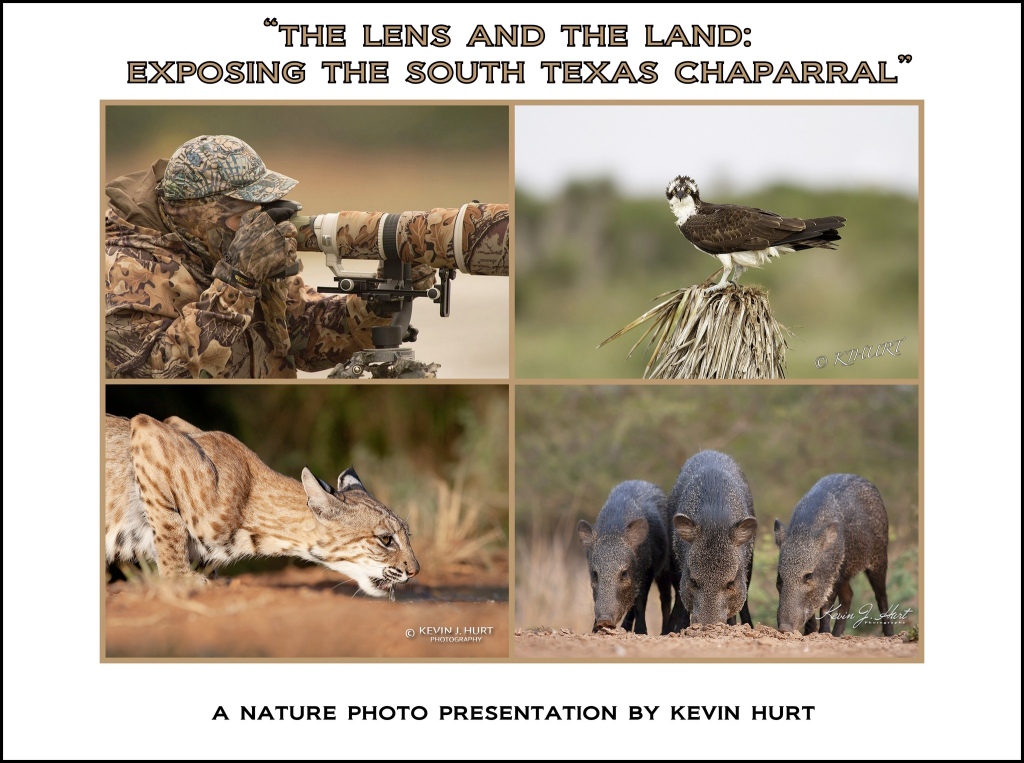


Where Have You Been?

I have been getting that question a lot lately as I all but disappeared completely from my blog posts. However, I have been here and busy as ever. I have continued my nature photography exploits but I have nearly doubled, tripled even, my involvement in sports/action photography. For the past year, the sports photography has dominated my time and since I’ve tried to keep this blog dedicated to my wildlife/nature pursuits, I didn’t blog about the sports stuff. So, let me give you a brief update on my near-term plans: 1) I will get back to my first photographic passion (nature photography), 2) I’ll continue expanding my sports/action photography, and 3) I’m committed to getting a YouTube channel started that will mostly be about nature and sports/action but since I plan on doing that for fun, I’ll share other things that I enjoy (gear reviews, BBQ, and other general interests).

WHATS NEW ON MY BLOG?:  I have added a new page for Gear Recommendations. I find that I’m always answering questions related to gear so I put together this page to help others.

That’s it for now but I’ll leave you with a few sample nature images. I’ll update you once my YouTube channel is up and running. Until then….

Good light and keep shooting. — Kevin


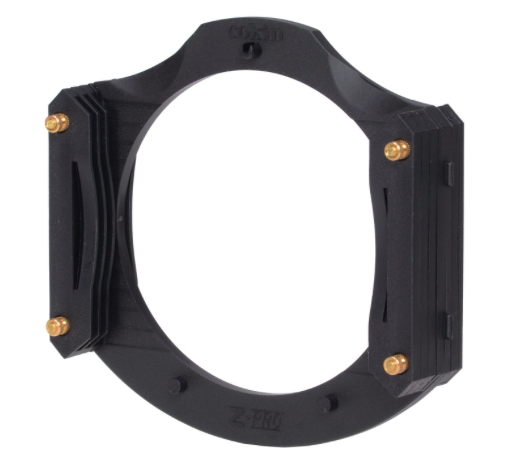
Cokin Z-Pro Filter Holder: Sold

screen-shot-2017-01-07-at-11-56-35-am

I’m selling a Like New Cokin Z-Pro Filter Holder for anyone who is interested. I’ve used it just a few times but I’ve decided to clean house on some of the items I rarely use. I’ve attached a stock photo and have foregone the description as chances are, you know exactly what this is used for.

$60 shipped in continental USA.

I’ll be back with some new images soon. Until then, good light and keep shooting.

KEVIN